
Construction Preparation

Construction Precautions
(1) Before excavating the embedded foundation, survey the site to confirm the absence of municipal utilities and pipelines underground.
(2) Only proceed with road excavation after confirming the installation location is unobstructed.
(3) Identify the soil composition at the embedded foundation location.
(4) Remove surrounding obstacles.
(5) Enclose the construction site with caution tape or safety barriers.
Construction Steps
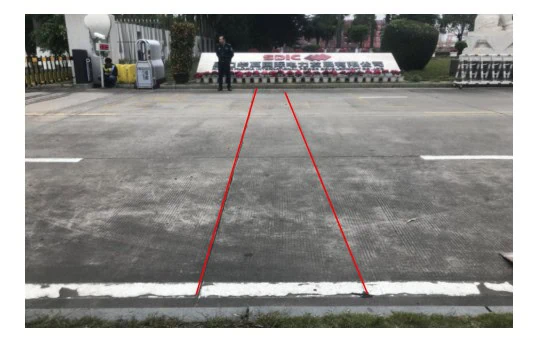
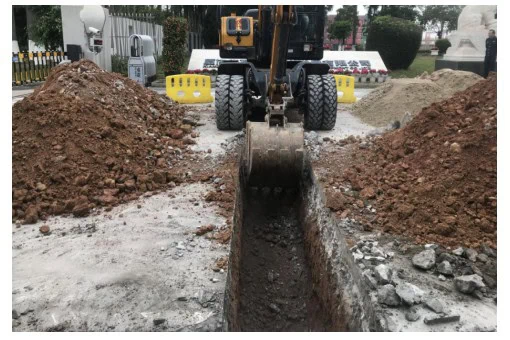
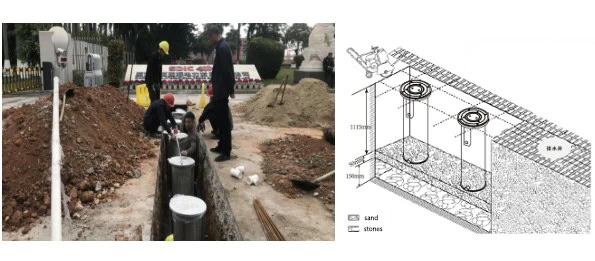
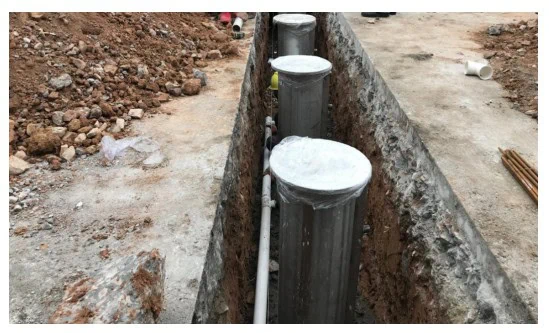
(1) Excavate a trench 80cm wide and 100cm deep (dimensions may vary based on site conditions) according to drawings. Mark the installation area using a tape measure, string line, and marker pen.
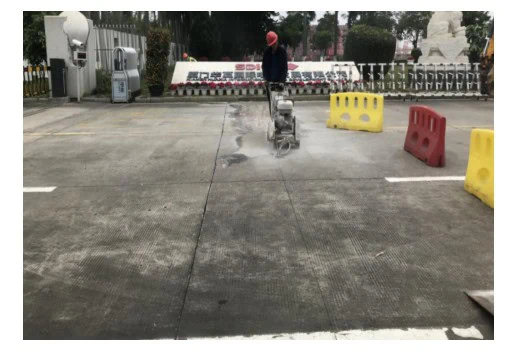
(2)Cut the pavement using a road cutter to ensure clean edges for the foundation trench.
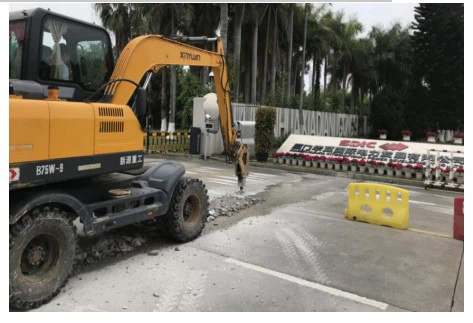
(3)Break up and excavate the pavement using pneumatic hammers or demolition equipment.
(4) Foundation pit dimensions: Width 80cm, depth 100cm, length determined by on-site road conditions. After excavation, create a drainage layer by sequentially laying a 200mm crushed stone layer and a 100mm crushed sand layer at the base. Level and compact the drainage layer to prevent bollards sinking. If conditions permit, use crushed stone smaller than 10mm to omit the sand layer. Determine whether to install a drainage system based on local conditions. Connect the drainage pipe from the bottom of the bollard’s pressure relief chamber to a 90-degree PVC pipe, with its outer opening facing the ground to direct accumulated water into natural underground drainage.
(5) Position the automatic bollards, adjust the spacing between bollards, and ensure levelness.
(Note: When embedding the rising bollards, ensure the top of the outer casing aligns with the horizontal ground level. When installing multiple rising bollards, ensure each column is in a straight line. Secure each bollard with rebar or angle iron.)
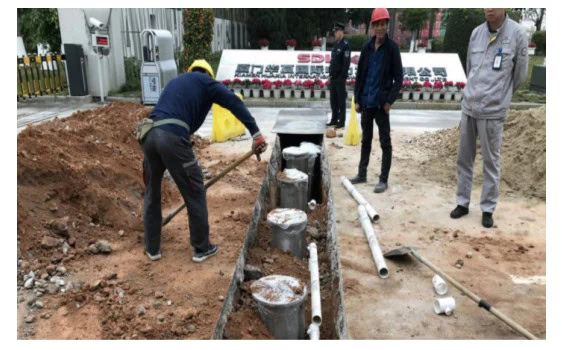
(6) Embed drainage pipes according to the pre-reserved drainage holes on the outer sleeve surface, connecting them to the drainage well. First secure the bollards with sand and gravel. Embed conduit pipes. Connect 90-degree pipes to the bottom drainage pipes of the bollards, positioning the pipes downward (natural seepage method). Use tee fittings and straight pipes to connect each bollard, routing the pipes to a storage tank (requires separate construction) or sewer system.
(7) Place the bollards into the pit, power it on to test whether the lifting post operates normally, then backfill with an appropriate amount of sand and gravel while ensuring level and symmetrical alignment. Backfill up to the position of the pre-reserved cable outlet hole on the bollard surface, and embed the conduit to the control system installation location.
(Note: Separate pipe and wiring must be laid from the control box to each rising bollard. Internal control wiring can be installed simultaneously with the lowered PVC pipe. Leave a 30mm length at the control wire connection point to the rising column. Ensure proper insulation and waterproofing at the wire ends.)
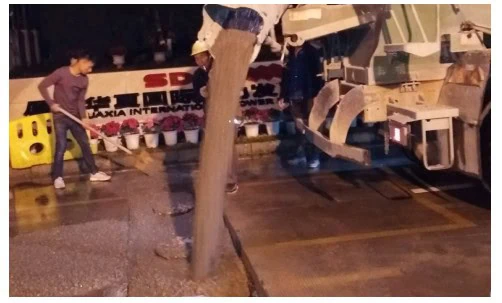
(8) Slowly and evenly pour C30 concrete until it reaches the level of the bollard’s upper surface. Pour the cement in multiple stages during the process. After the bollard has been secured, remeasure the level of the lifting post to prevent displacement during pouring that could cause it to tilt. Once leveled, pour the remaining concrete evenly until the surface is level.
(Note: Continuously check levelness with a spirit level during pouring. After concrete placement, cordon off the construction site and allow at least 7 days for curing. Restore the road surface with concrete at least 20cm thick. The bottom of the drainage well also requires 10cm of concrete placement.)
(9) Automatic Bollard Installation Diagram
